Secrets to Creating Low Poly Illustrations in Blender
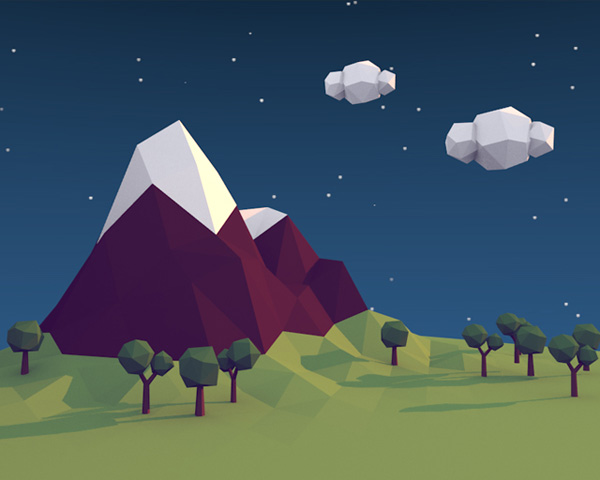
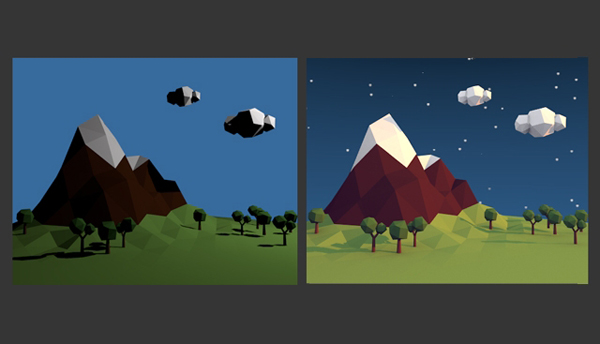
Low poly style illustrations are a hot trend these days and we see them everywhere – books, animations, music videos, apps, etc. and today you'll learn how to create one in Blender. This tutorial will focus more on how to achieve the style, rather than learning illustration theory or modeling anything in particular. We will create one example illustration and learn the steps to achieve the desired result.
Looking for a Quick Solution?
If you're looking for a quick solution, there's a great collection of low poly models and illustrations over at Envato Market. Starting from just a few dollars, it's a great way to quickly build up a collection of high-quality low poly items for your project.
Or if you're looking for something more comprehensive, you could try the 3D design & modeling services on Envato Studio. You can find experienced providers to do photorealistic 3D rendering, create 3D logos, and much more.
Secret Ingredients
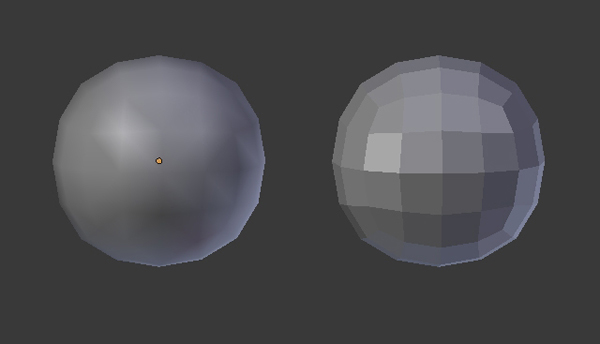
Flat Shaded Models
One of the main requirements to achieve this style, is that the models must be flat shaded. This will give a blocky looking result, which a smooth shaded surface does not produce.
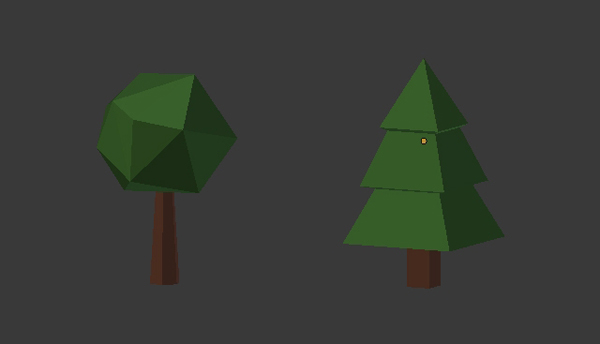
Low Poly Models
Another prerequisite for this style is that the models must be low poly (obviously!). The forms must be drawn close to basic geometric shapes. For organic models, if you find it difficult to built them using less triangles, then don't worry. You can construct the model as you want and later crunch those polys down with the help of the Decimate Modifier. You can also import and use your existing mid-poly models, and then use the Decimate Modifier to reduce the polygons.
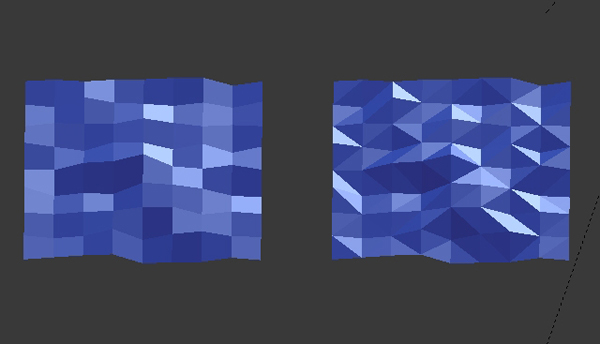
Triangles
For better results, it's sometimes good to triangulate the mesh. Triangles are something we typically avoid while modeling, as we like to keep everything in quads. But no problem, every quad or square are two triangles combined together, so we don't have to build the models thinking only in triangles. Just construct the models as you usually would, and in edit mode we can triangulate the mesh.
Now we will create a scene and learn how to apply the above points to achieve the desired style.
2. Rough Sketch and Layout
Step 1
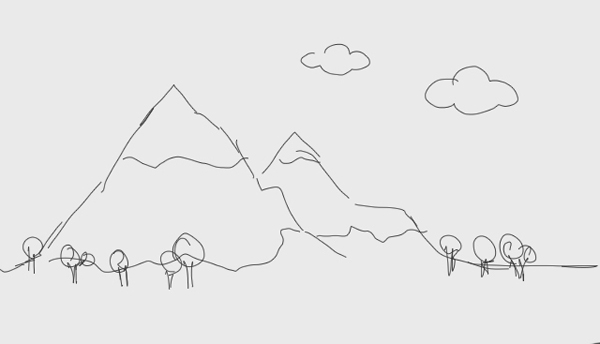
First draw a rough sketch of the illustration. This is necessary as it will serve as a blueprint and you won't feel lost later. Although everything is constructed in 3D, the illustration itself is 2D Art. Everything is arranged for a 2D frame, be it cinema, photography or 3D illustrations. The final result is shown on a monitor, TV screen or cinema screen, which are all 2D surfaces. So the layout or frame, must be properly balanced and arranged.
3. Modeling The Terrain
Step 1
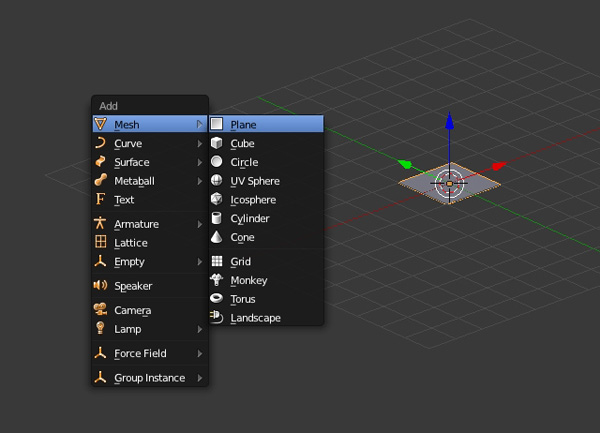
In a new file press Shift-A and add a Plane.
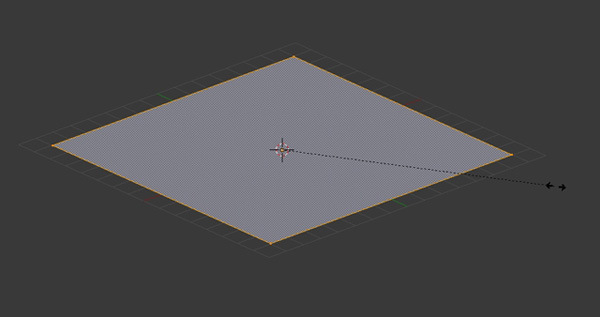
Press TAB on the keyboard to enter into Edit mode. Then Press S and drag the mouse to scale the Planeup.
Step 2
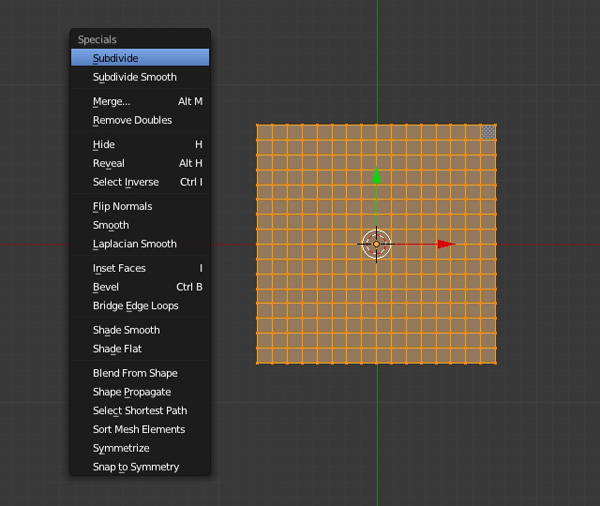
While in the Edit mode and with the mouse pointer in the 3D view, press W and select Subdivide, to subdivide it.
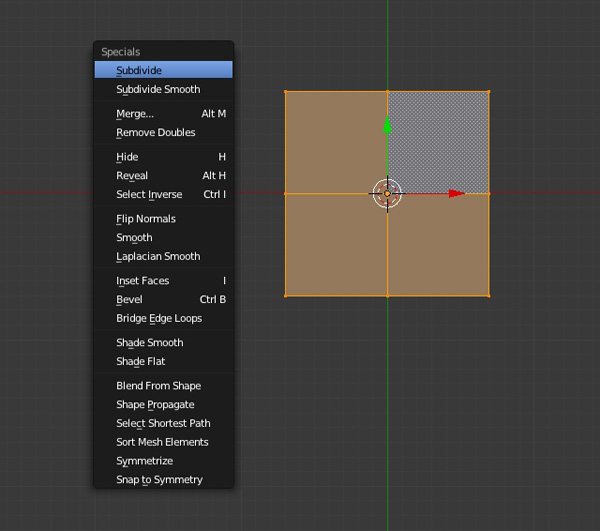
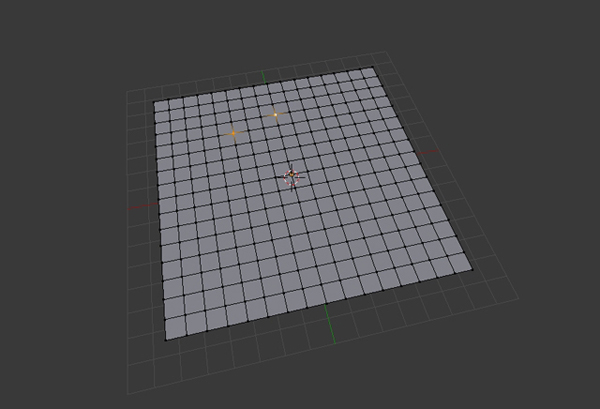
Do this several times. Three to four times would be sufficient, don't make it too dense.
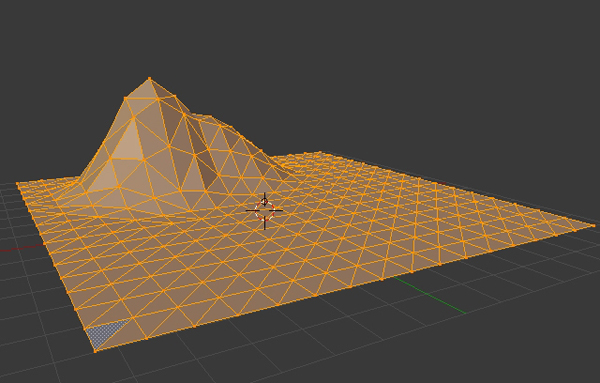
Step 3
Press A to deselect all the vertices. Now to create the mountain ridge, select two vertices as shown in the following image. Right Click on any vertex to select it, and then hold Shift and Right Click on another vertex to select multiple vertices. Here I have pressed 5 on the Numpad to get into Perspective mode. To Rotate the view, click and drag using the Middle Mouse Button.
Step 4
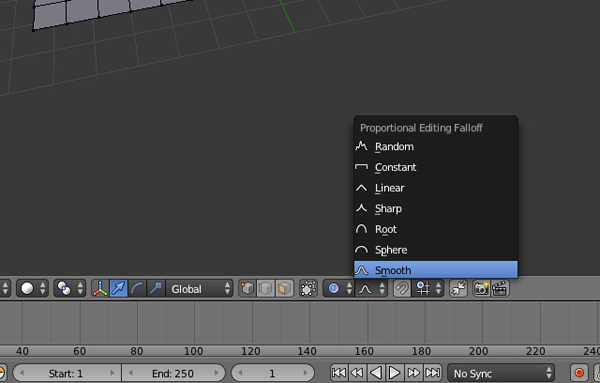
While in Edit mode, press O on the keyboard to enable the Proportional Editing Tool (Soft selection), and make sure that Smooth falloff is selected.
Step 5
Now drag the Arrow Widget to move the vertices upward (Z axis). Or press G and then Z to move the vertices along the Z Axis only. Move them up just a little bit, not too much. You can increase or decrease the area of influence with the Mouse Wheel.

Now select only one of the verts and pull it upwards. Again you can either use the Arrow Widget, or press Gand then Z and move your mouse, to move the vertex up.

Step 6
Press A to select all the vertices, and then Press Control-T to triangulate the mesh.
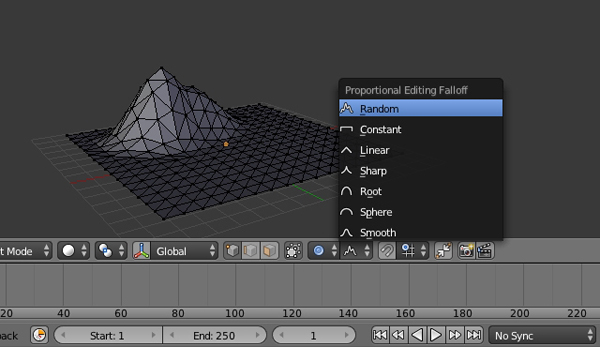
Step 7
Press A again to deselect the mesh. Now select Random Falloff mode.
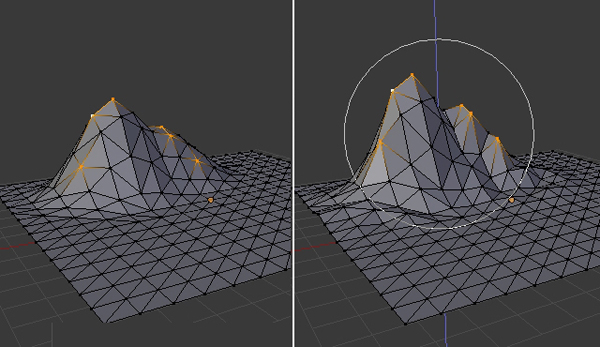
Step 8
Select a few of the peak points and move them upwards (hold Shift and then Right Click to select more than one vertex.) You will see that the mountain is now taking shape, but take care that the ground is not being affected too much. You can also tweak the points individually to achieve the desired effect.
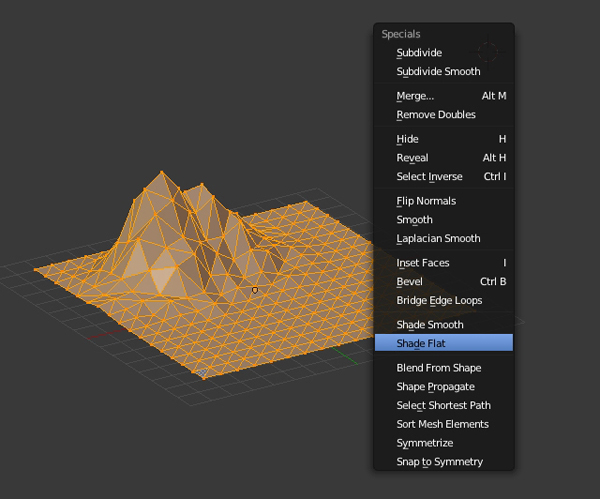
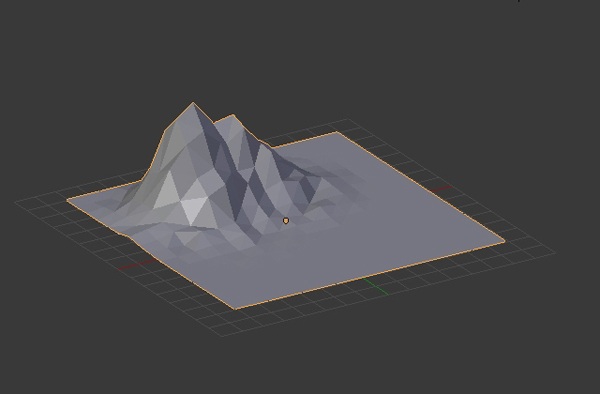
Step 9
Again select all the vertices by pressing A, and then press W to bring up the Specials menu. Select Shade Flat to give it a flat look and then press TAB to exit Edit mode. The mountain is now ready. So press Control-S to save the file.
3. Assigning Materials to the Mountain
Step 1
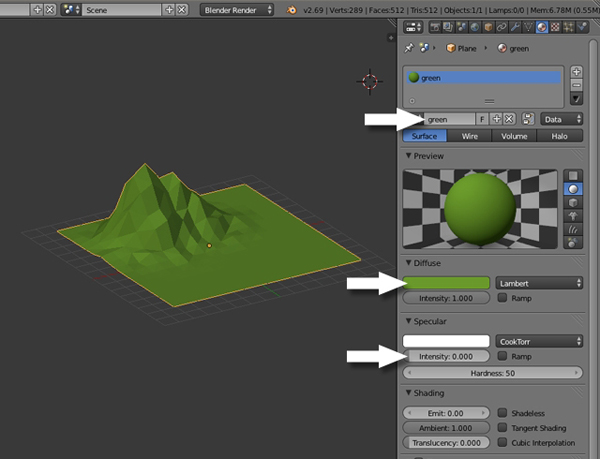
With the Mountain object selected, click on the Materials button in the Properties window and press the New button.

Name the new material "Green" or "Ground", and set the Diffuse color to a warm green. Reduce the Specular Intensity to 0.0, as we want to have a non-shiny material.
Step 2
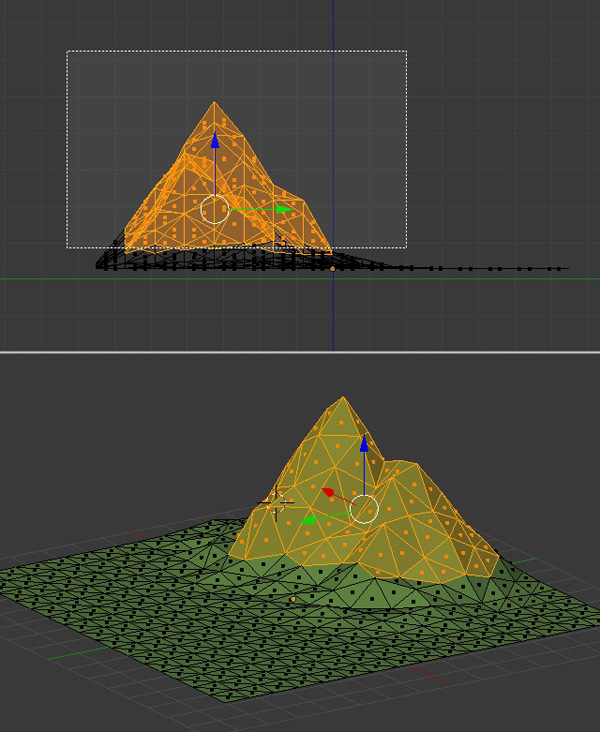
Here we will learn how to assign multiple materials to a single object. Press TAB to enter into Edit mode and then press Z for Wireframe mode, so that while selecting we are able to select the faces and vertices which are behind and nothing will be left out. Press Control-TAB and select Face in the Mesh Select mode menu. Now press B and drag to select the part of the mountain which is above the ground. If you miss some faces, manually select them by holding down the Shift key and Right Clicking on them.
Step 3
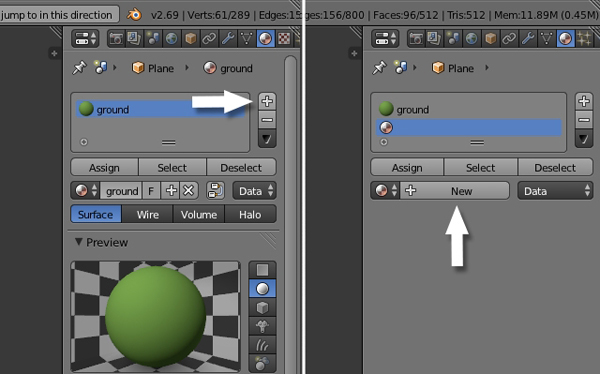
Click on the + button to add a new material slot and then press the New button.
Step 4
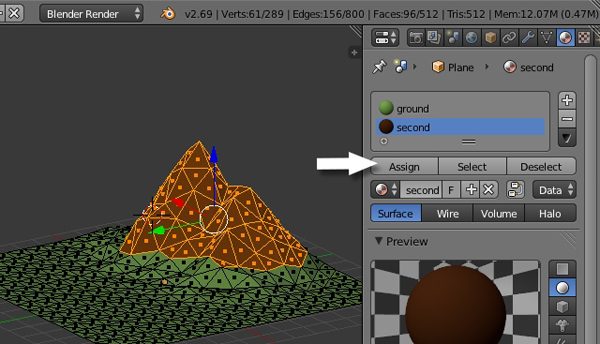
Name the new material, and give it a nice stone color or make it brown. Again, reduce the SpecularIntensity to 0.0.
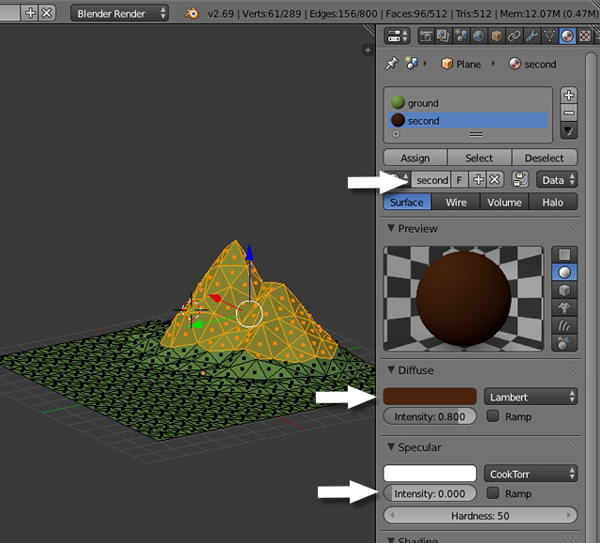
Finally, click Assign to assign the new material to the selected faces.
Step 4
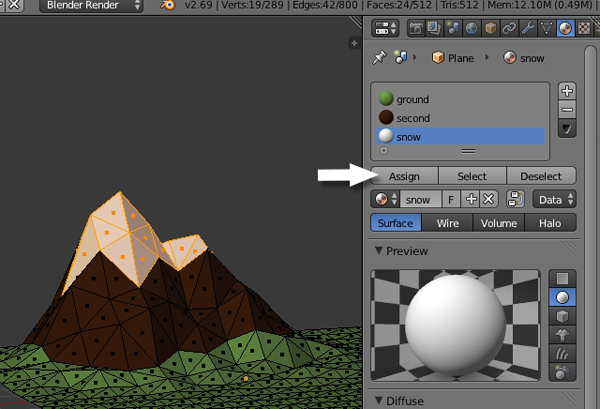
Now we will create some snow on top of the mountain. So select the top few faces and create a new material (just as we did to create the second material.) Press the + button to add a new slot, click on the New button, change the color to White and reduce the Specular Intensity to 0.0.
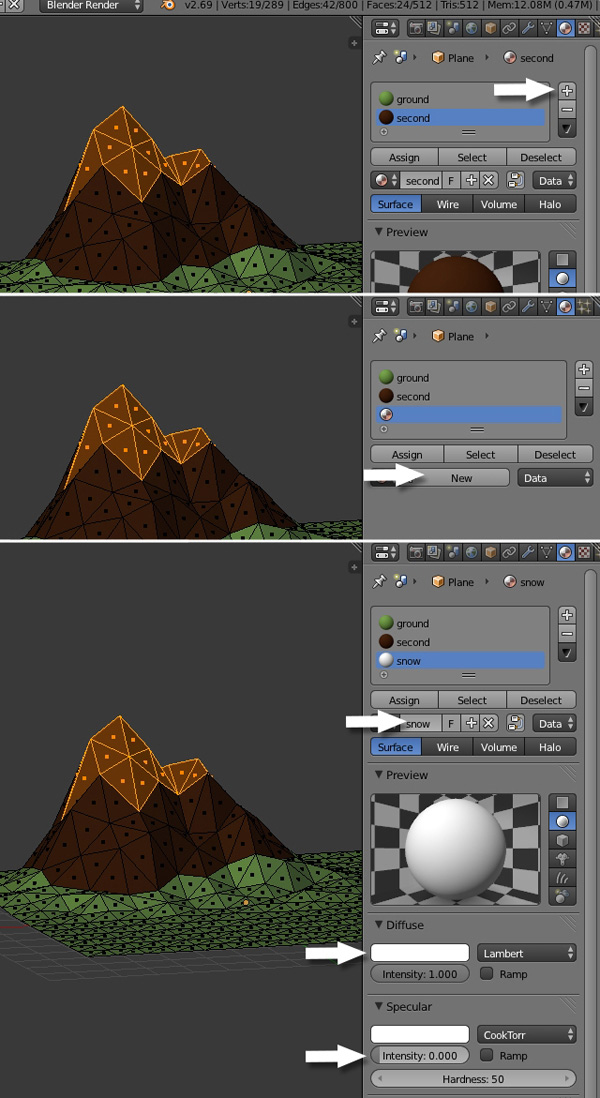
Finally, press Apply to apply the material to the selected faces.
4. Modeling the Trees
Step 1
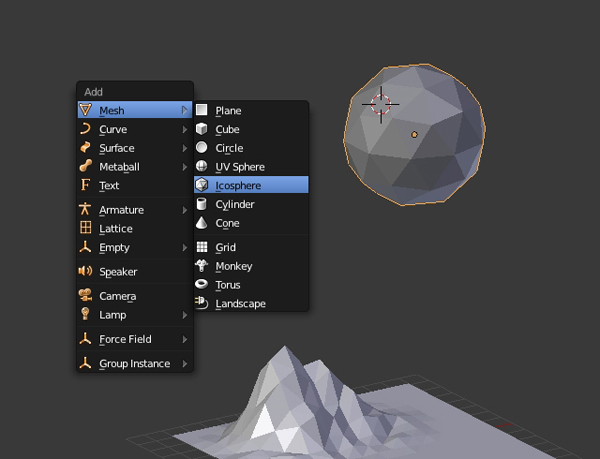
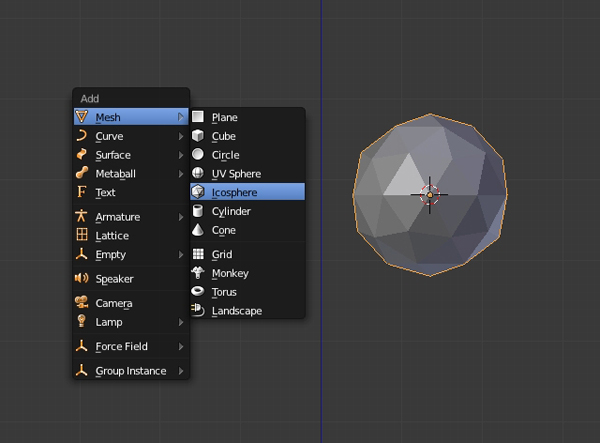
Left Click on an empty space to bring up the 3D cursor. Press Shift-A > Mesh > Icosphere to add a sphere to the scene.
Step 2
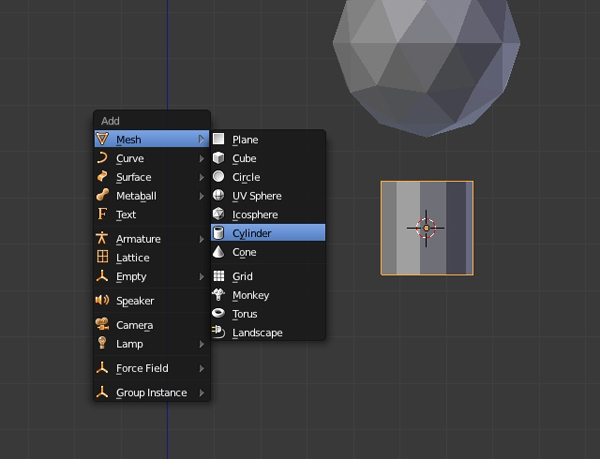
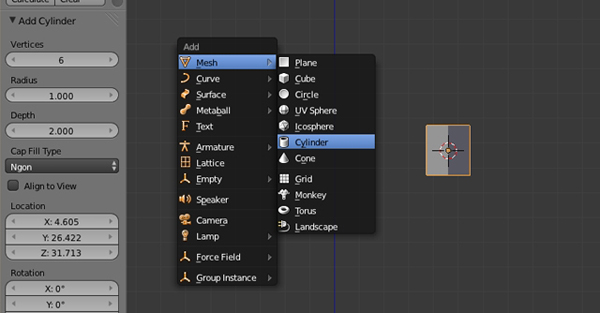
Press . (period) on the numpad to make it centered and 3 (on the numpad) to get into the Right view (Press 5 to turn off Perspective view.) Press Shift-A and add Mesh > Cylinder.
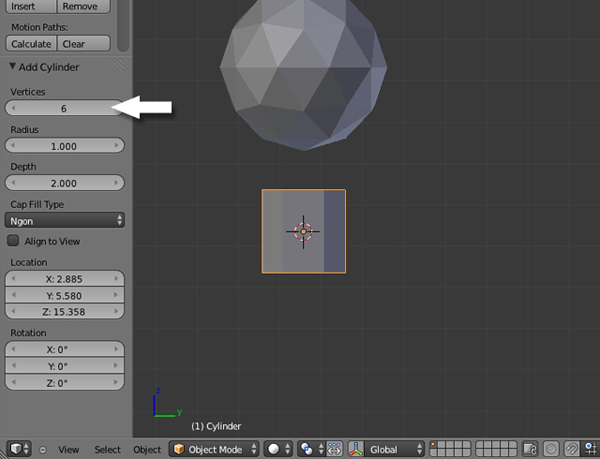
Press T to bring out the Tool Shelf (if it's not already there) and reduce the Vertices to 6.
Step 3
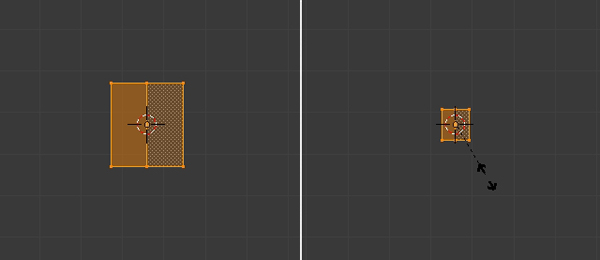
Press TAB to enter into Edit mode. Select all the vertices by pressing A, and press S to scale them down to make the trunk of the tree.

Step 4
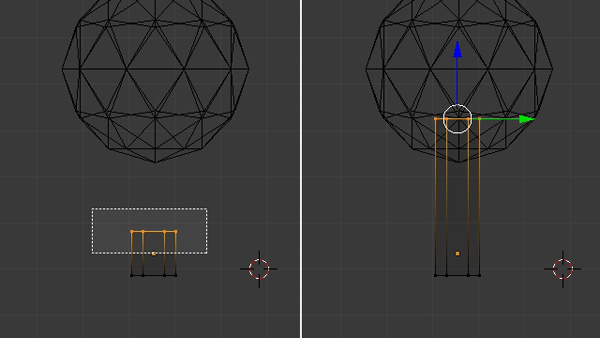
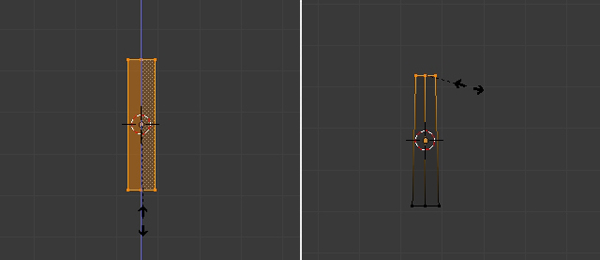
Deselect all the vertices with the A key. Then press B to drag select only the top vertices and then pull them up along the Z axis, by dragging the Arrow Widget or by hitting the G key and then Z, moving the mouse and finally clicking to confirm.
Step 5
With the top row of vertices selected, press S and scale them down to give the trunk a nice shape (you can also press Z to preview it in Solid mode.)
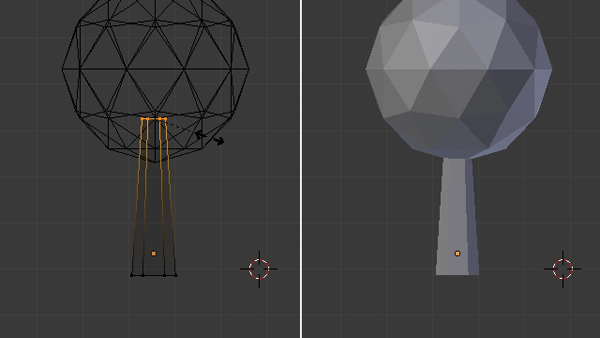
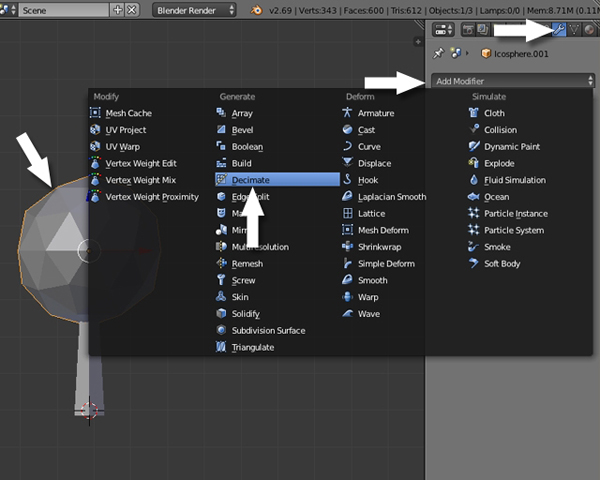
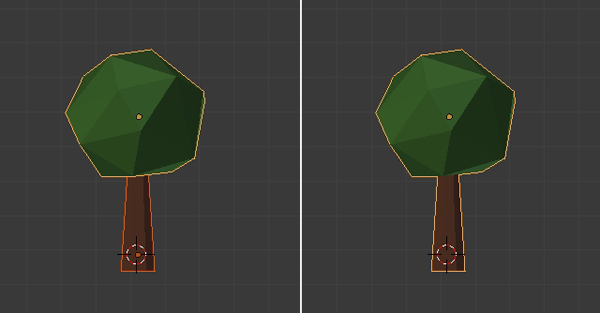
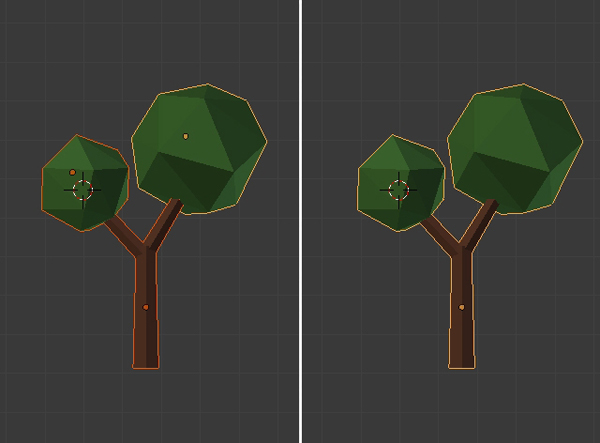
Step 6
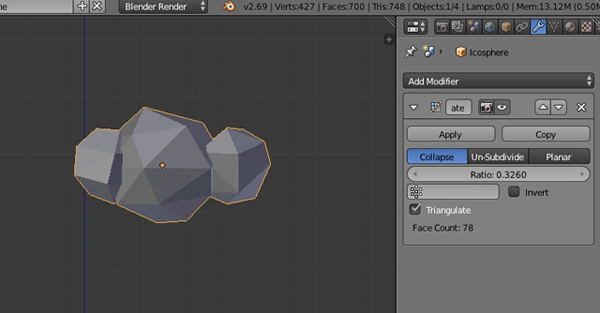
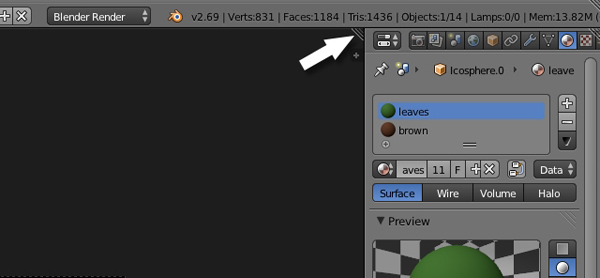
Now we will reduce the polygons for the leaves. Select the object (icosphere) by Right Clicking, and then click on the Modifiers button in the Properties window, and select Decimate.
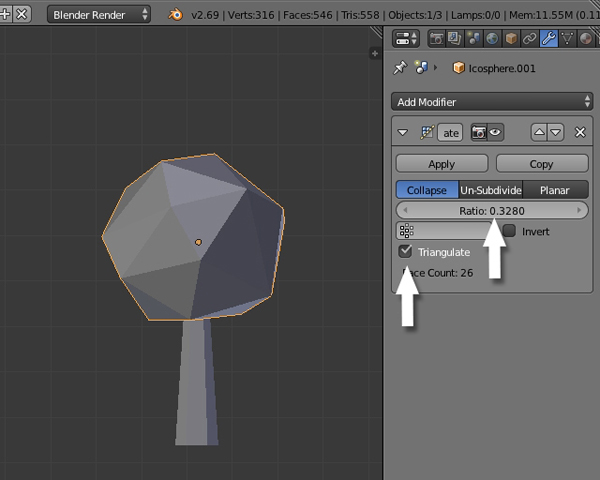
Reduce the Ratio according to how low poly you want the tree to look.
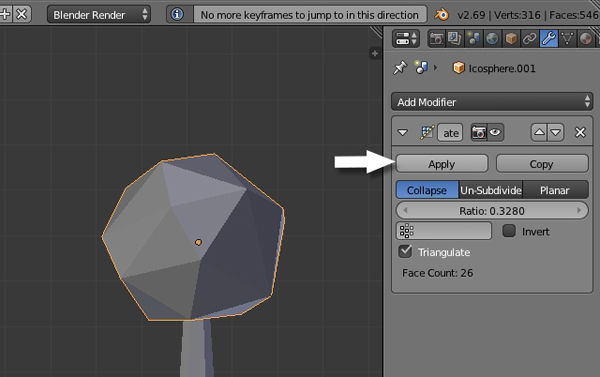
Finally click Apply.
5. Creating Materials for the Tree
Step 1
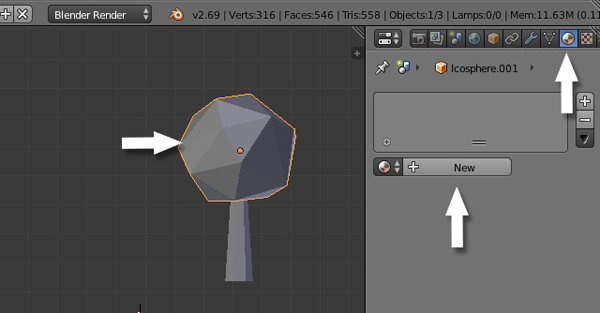
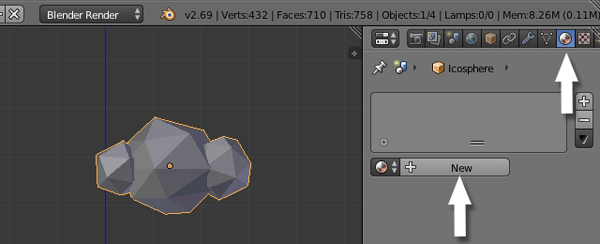
With the leaves selected, click on the Materials button on the Properties panel and add New.
Step 2
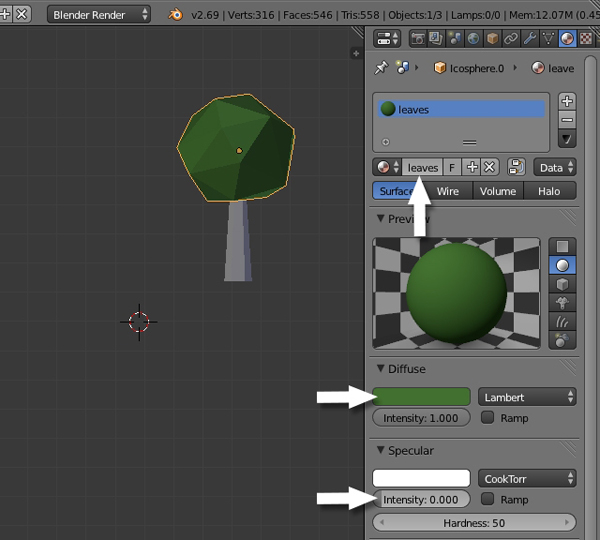
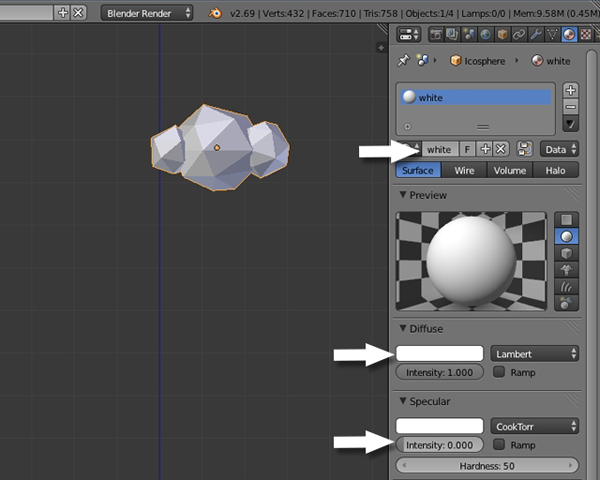
Name the new material "Leaves" and choose a nice green color. Reduce the Specular Intensity to 0.0.
Step 3
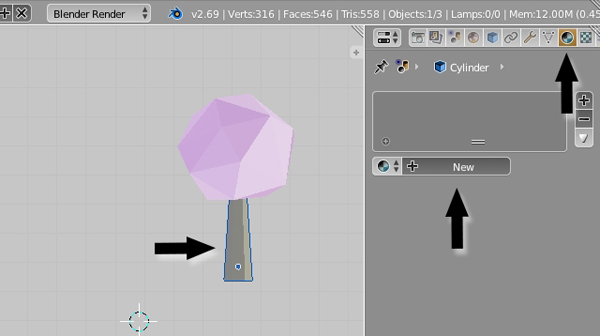
Now select the Trunk, and in the Material properties click on New.
Step 4
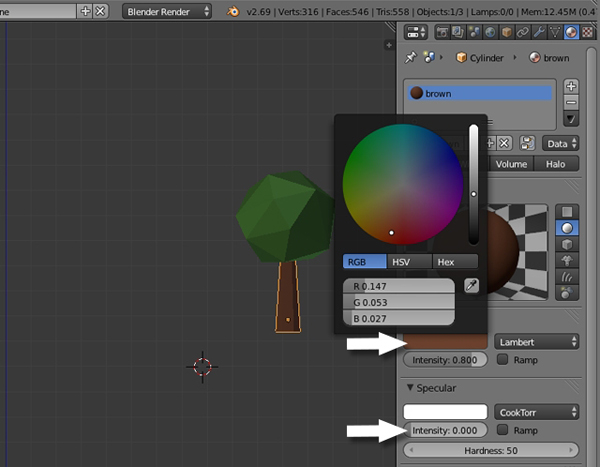
Name the new material "Brown" (or whatever you like.) Choose a nice brown color for the Diffuse and reduce the Specular Intensity to 0.0.
6. Making the Tree a Single Object
Step 1
Select both objects (hold Shift and Right Click on the objects) and then press Control-J to join them, and make them a single object. The tree is now ready.
7. Modeling a Different Tree
Step 1
Press Shift-A to add a Cylinder. In the Tool shelf, reduce the Vertices to 5 or 6.
Step 2
Press TAB to enter into Edit mode, and select all the vertices with the A key. Press S to scale them down.
Scale them again along the Z axis. Press S and then Z to scale vertically. Select the top row of verticies with the B key, and Scale them down to give it a nice form.
Step 3
Select all the vertices by pressing the A key. And then press Shift-D to duplicate the selection. Click anywhere to confirm.

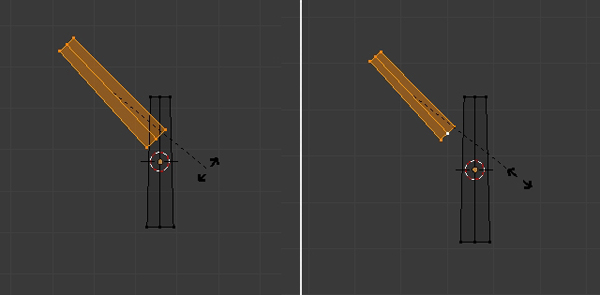
Step 4
Press R to Rotate the mesh to form a branch. Scale the new mesh down with the S key.
Step 5
With the new mesh selected, press Shift-D to duplicate it.
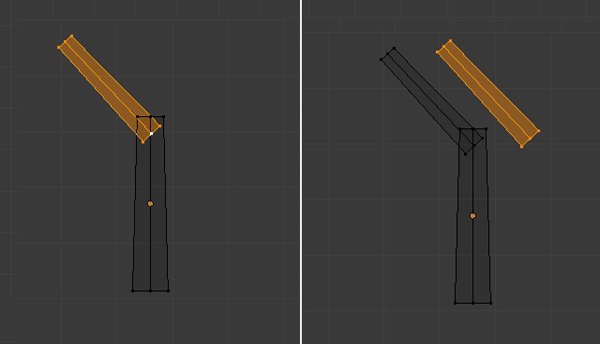
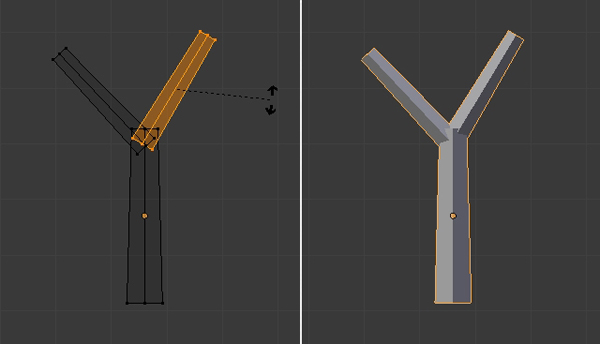
Press R to Rotate it, and then TAB to exit Edit mode.
Step 6
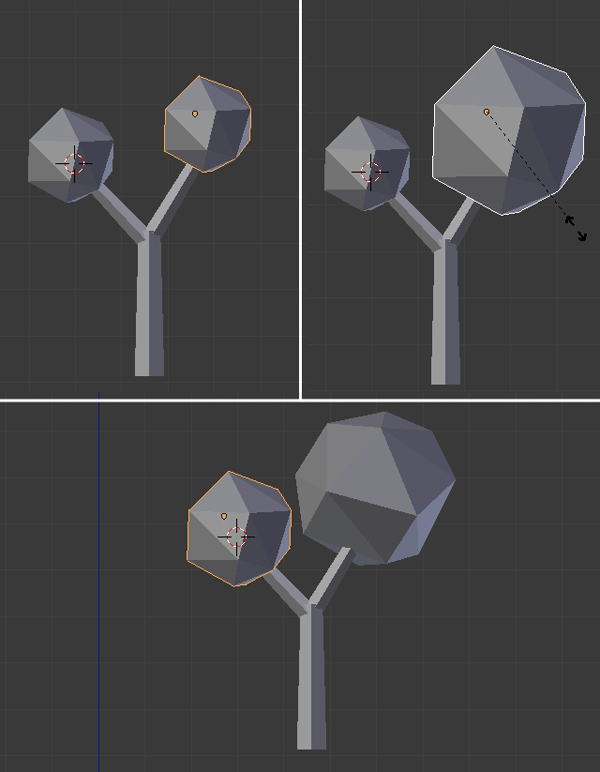
Click on an empty space near the new trunk, press Shift-A and add an Icosphere.
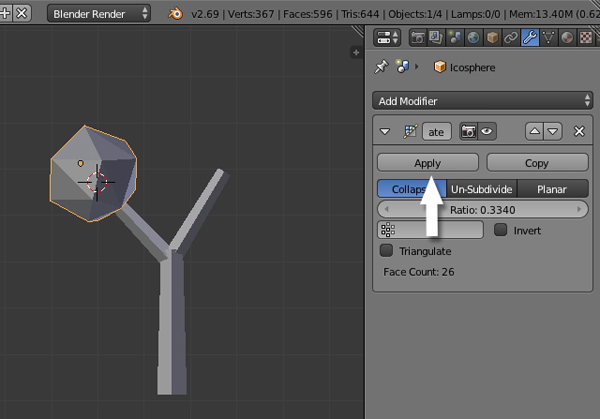
Step 7
With the sphere selected, click on the Modifiers button in the Properties window, and add a Decimatemodifier.
Reduce the Ratio amount to achieve a nice low poly look.
Finally click Apply
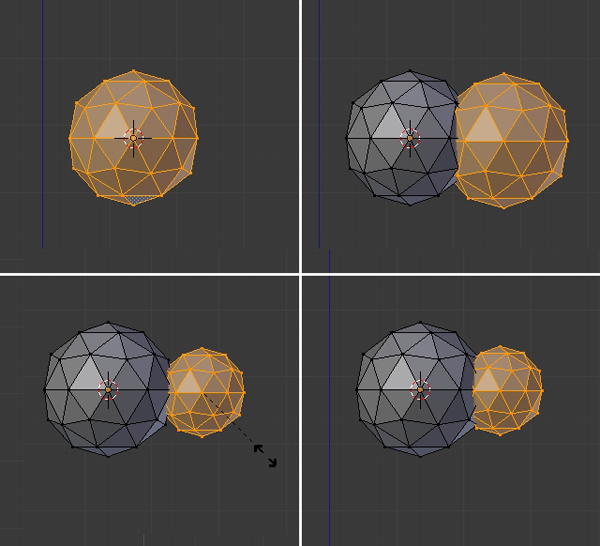
Step 8
Select the Icosphere by Right Clicking, and press Shift-D to duplicate it, and then click again to confirm. Place it on the second branch (Press G to move) and scale it with the S key (to Rotate, press R). You can adjust both spheres to give the tree a nice shape. Our second tree is now ready.
8. Assigning Materials to the New Tree
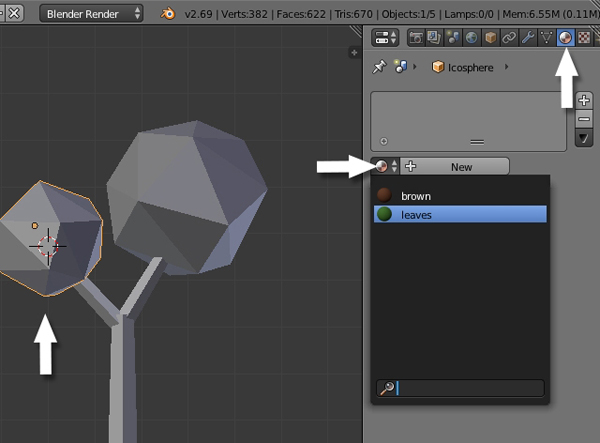
Step 1
Right Click on the Sphere to select it. And in the Material properties, assign the already created Leavesmaterial to the Sphere.
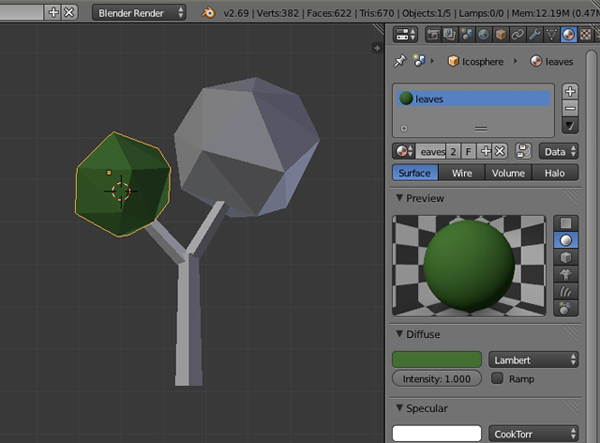
Step 2
Similarly assign the corresponding materials to the rest of the parts.
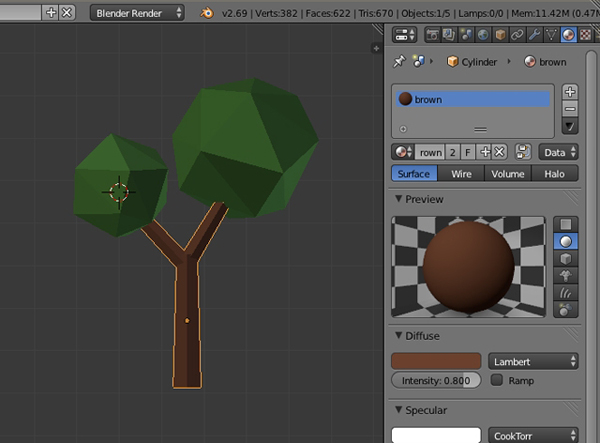
Step 3
Select all the objects of the new tree, and press Control-J to combine them into one single object. The second tree is now ready.
9. Creating the Clouds
Step 1
Press Shift-A and add another Icosphere.
Step 2
Press TAB to get into Edit mode, and select all the vertices by pressing the A key. Press Shift-D to duplicate the mesh and click again to confirm the position. With the new mesh selected, press S and scale it down, and G to move the selected mesh into the right position.
Step 3
Similarly, duplicate the sphere again to complete the cloud, and press TAB to exit Edit mode.
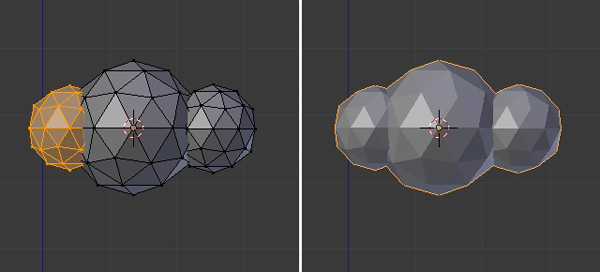
Step 4
With the cloud selected, click on the Modifiers button in the Properties window, and select Decimate.

Reduce the Ratio amount to achieve a low poly look, but not too much that it loses its shape.
Step 5
With the cloud selected, click on the Materials button in the Property window, and then click on the Newbutton.
Name this material "White" or "Clouds", and set its Diffuse color to white, and reduce the SpecularIntensity to 0.0.
10. Bringing it All Together
Step 1
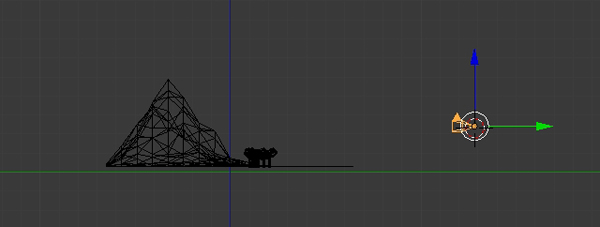
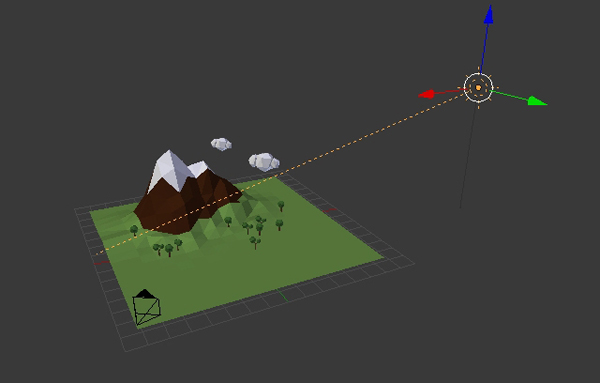
Now lets arrange all the objects together to make the scene. Press 3 on the numpad to get into a side view. Switch to Ortho view by pressing 5 on numpad (if you are in Perspective view). Now select the tree by Right Clicking on it, and then press G to move it to the desired position. Scale it as needed with the S key.

Step 2
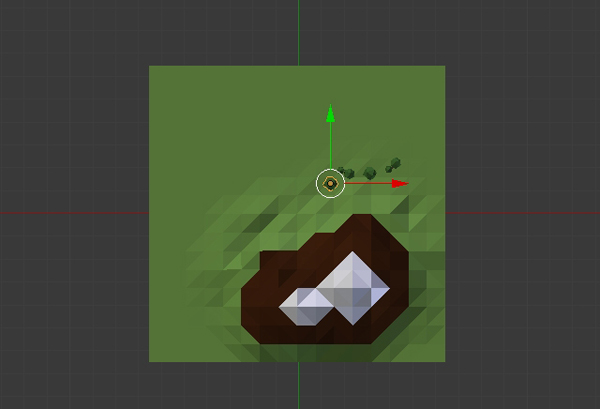
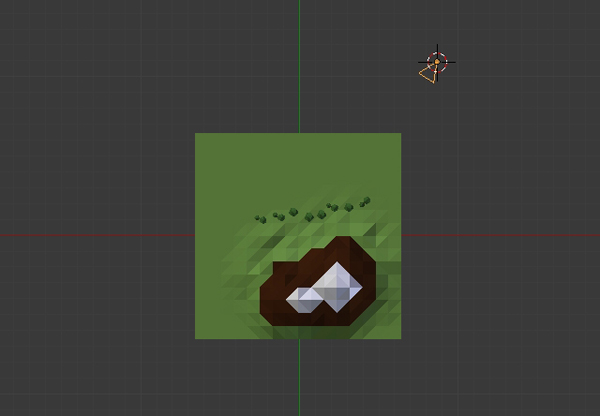
Press 7 on the numpad to get into the Top view. Select the Tree and press Shift-D to duplicate it. Place it alongside the mountain and repeat this process to create a nice landscape.
Step 3
Now we'll add the camera. Press Shift-A and add a Camera and place it according to your composition. Press G to move and R to rotate the camera, and press 0 on the numpad to change to the camera's view.
Step 4
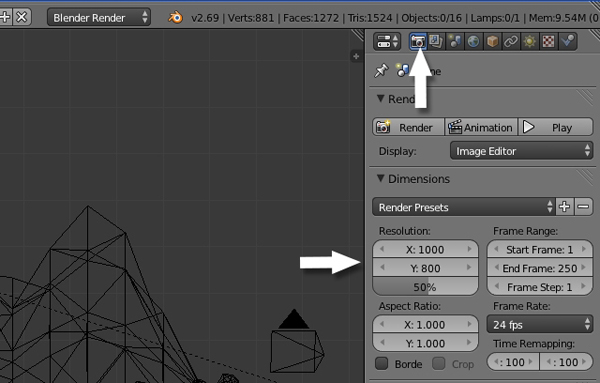
You can split the 3D view and assign one for the camera, one for the top and one for the side view. Move the mouse over the corner of the 3D view, and when it changes, pull to split the window. Move you mouse over any of the views and press 7 on the numpad to get a Top view, 3 (numpad) for a side view and 0 on the numpad for the Camera view. Now you can adjust the position of your objects, and see the arrangement in the camera view. While in the camera view, you can press Shift-F to move the camera to adjust the frame in a fly-through mode.
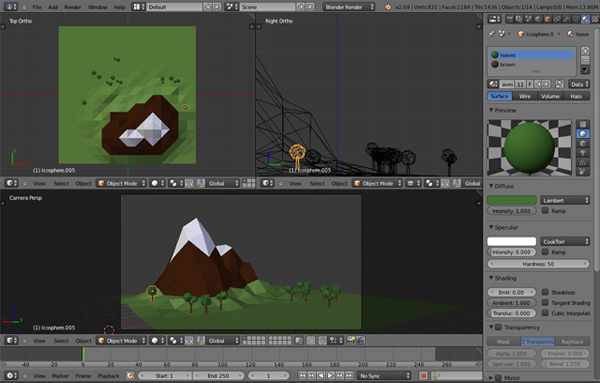
I have set a new size for the frame according to my needs in the Render panel. You can adjust yours, or leave it at the default.
Step 5
Now lets add some light. Press Shift-A and add a Sun. Place it on one side, and adjust its direction by rotating it with the R key.
With the Sun selected, click on the Light Properties. Change the color to a light yellow and turn on the Ray Shadows option.
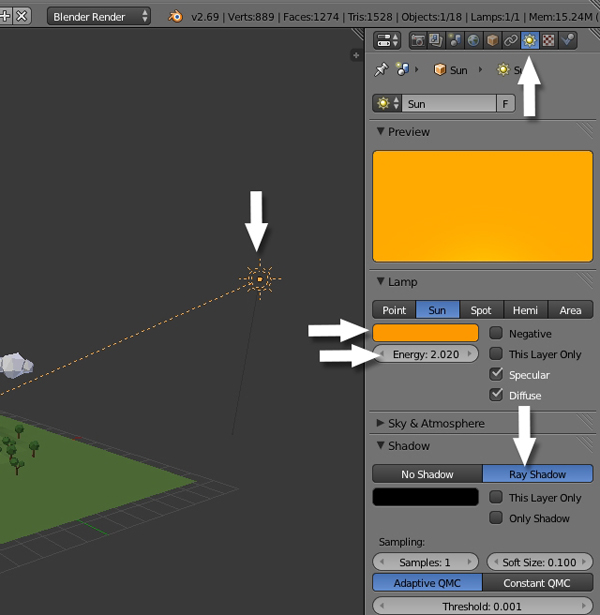
Now press F12 to render the scene.
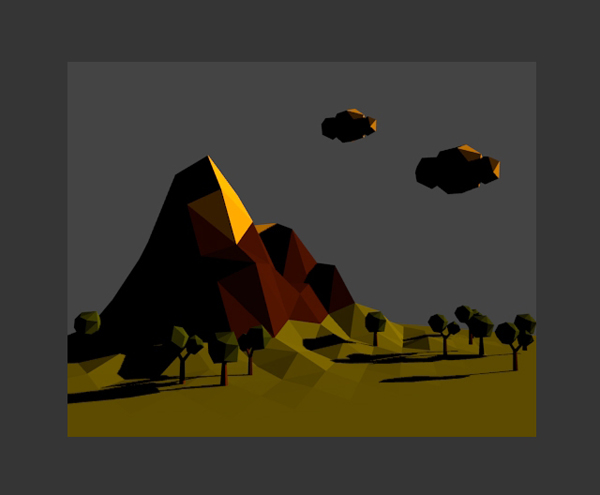
Step 6
Click on the World settings in the Properties panel and set the Sky color to blue and check the Blend Sky option, so that we get a nice gradient with the zenith color. Turn on Ambient Occlusion so we get realistic shadows, and also turn on Environment Lighting and choose Sky Color as the light source. In the Gather Panel, increase the Samples to 10, and finally turn on Stars.
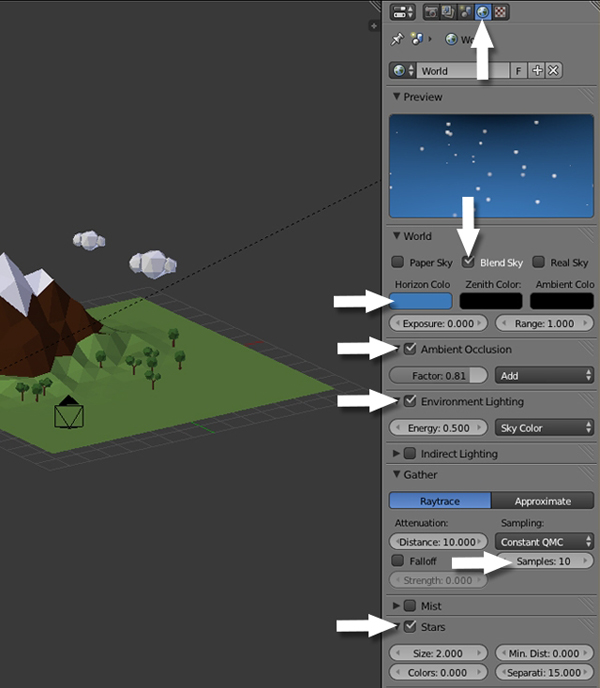
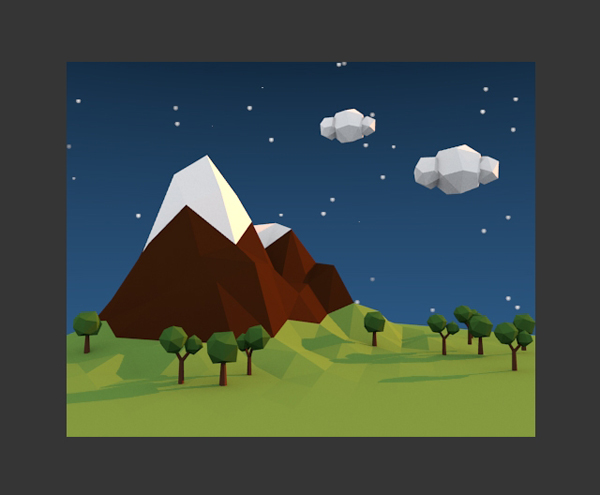
Hit F12 to render and you'll see the effect of the sky color and Ambient Occlusion.
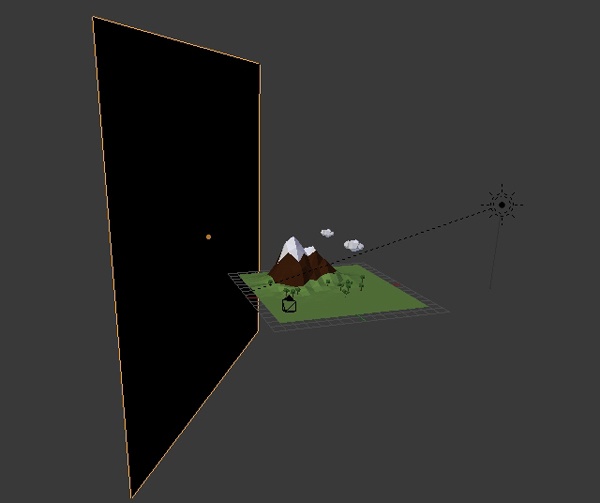
Step 7
I have added a Plane on the opposite side of the sun, so that the scene doesn't get much light from that side. Make sure it doesn't show in the camera view.
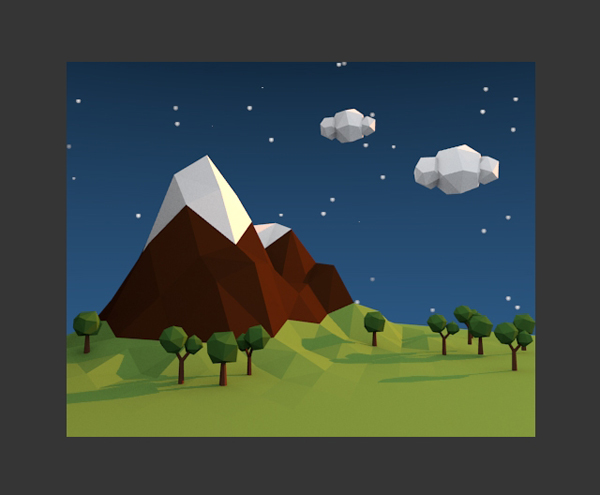
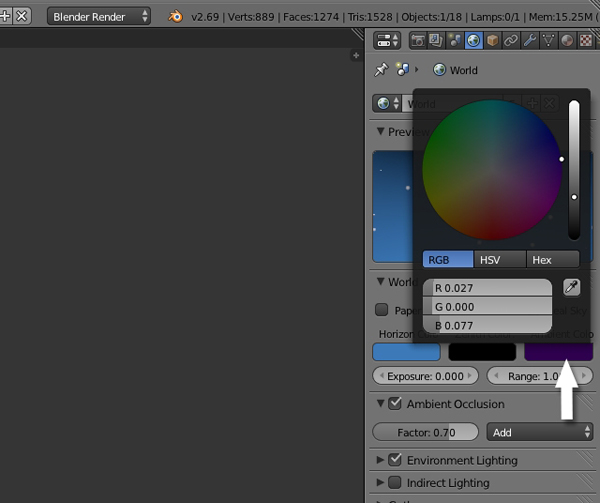
Step 8
In the World panel, Change the Ambient Color to dark purple. This will give a nice tint to the image.
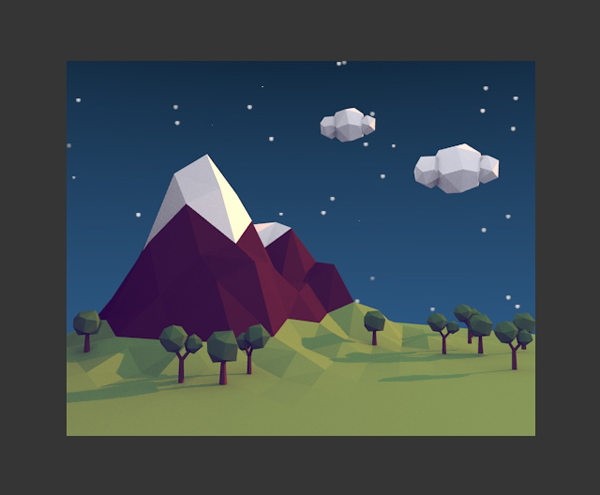
Conclusion
Hit F12 and see the magic! I hope you enjoyed this tutorial.

Comentários
Postar um comentário